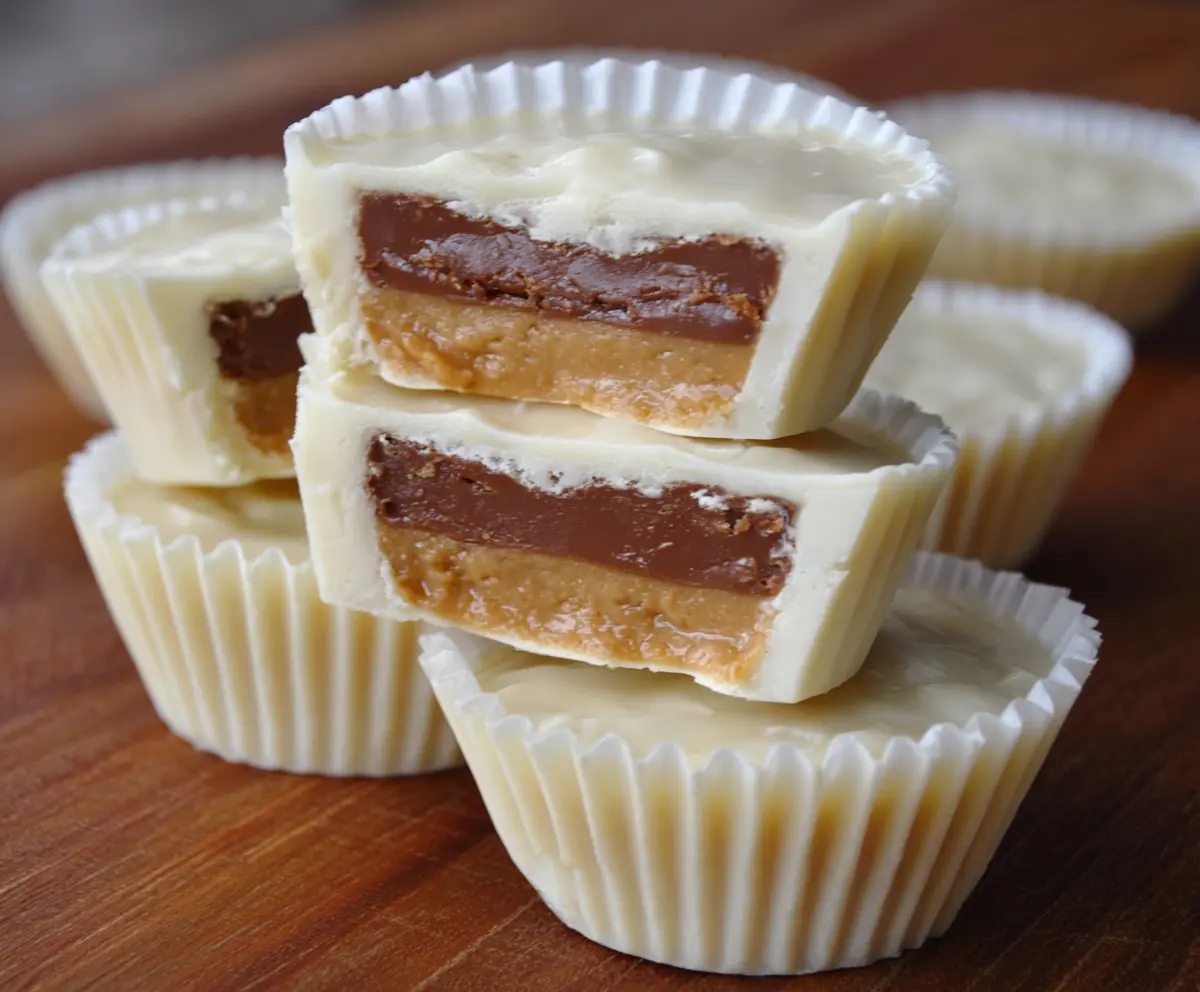
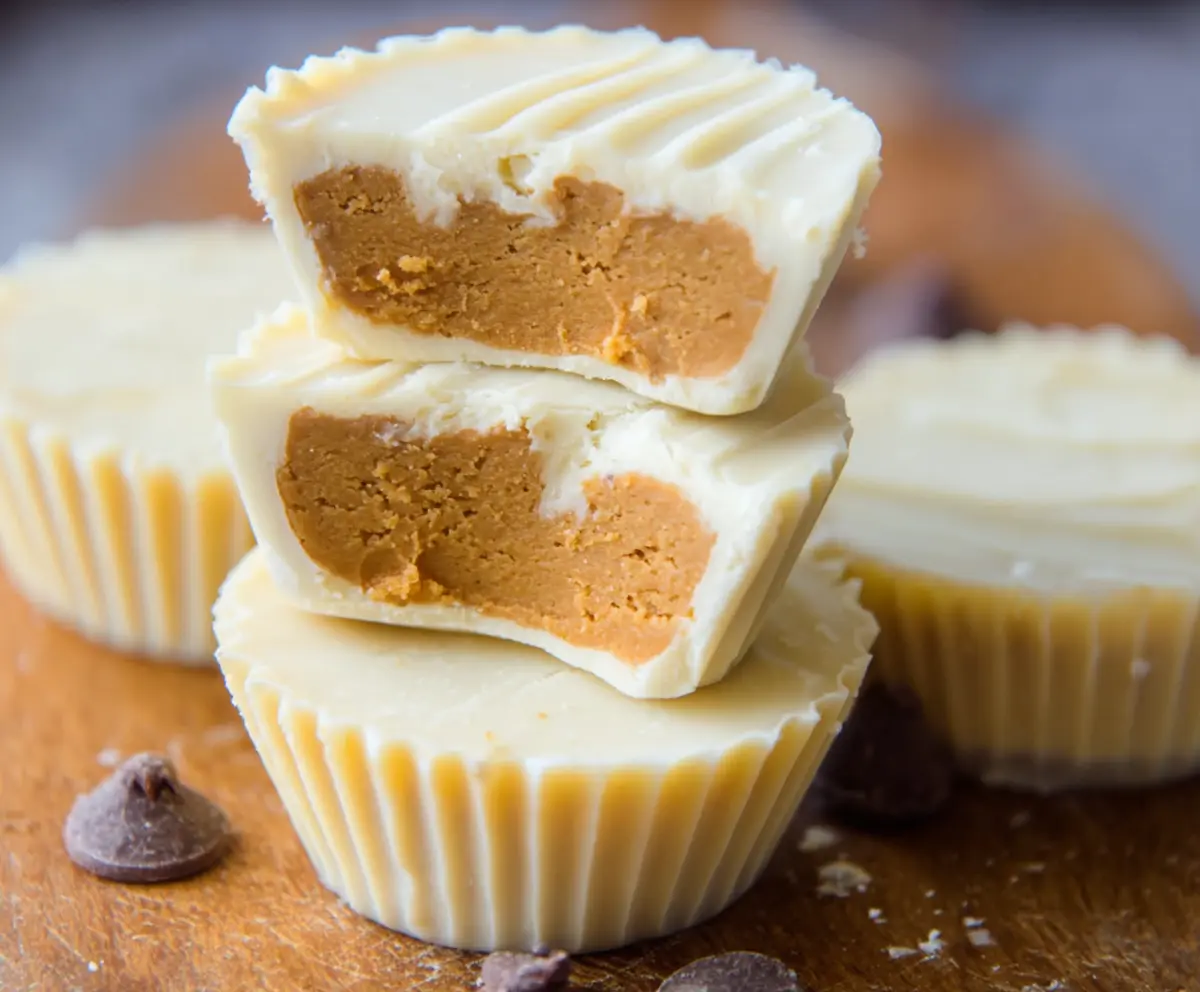
White Chocolate Peanut Butter Cups are a sweet treat that combines creamy white chocolate with rich, smooth peanut butter. They’re little bites of happiness with a perfect balance of sweet and nutty flavors that melt right in your mouth. These cups have a lovely creamy texture and just the right amount of peanut butter to keep you coming back for more.
I love making these at home because they’re really simple and don’t take long at all. I usually like to chill them until they’re nice and firm, then pop them in the fridge to keep them fresh. One thing I find helpful is using good quality white chocolate—it makes all the difference in how melt-in-your-mouth they turn out.
These peanut butter cups are great for sharing, gifting, or just keeping all to yourself when you need a little something sweet. I sometimes cut them into smaller pieces so I can snack on them throughout the day without feeling too guilty. They always bring a smile to anyone’s face, and I think that’s what makes them so special in my kitchen.
Key Ingredients & Substitutions
White Chocolate: Choose good quality white chocolate chips or bars. They melt smoothly and give a creamy finish. Avoid white chocolate candy melts if you can; they don’t taste as rich. If you prefer less sweetness, try mixing some white and milk chocolate.
Peanut Butter: Creamy peanut butter works best for smooth cups. Natural peanut butter can be used but may be a bit looser, so chill the mixture first. Allergy note: swap peanut butter for almond or sunflower seed butter.
Powdered Sugar: This sweetens and firms the peanut butter. If you’re avoiding sugar, you can try a powdered sugar substitute like erythritol, but the texture might change slightly.
How Do I Get Smooth, Even Layers Without Mess?
Making neat layers is easier than it sounds. Here’s my simple approach:
- Start by melting your white chocolate slowly in short bursts, stirring often to avoid burning.
- Spoon a small amount into your liner and spread gently with the back of the spoon, creating a thin but even base.
- Freeze until firm, so the peanut butter layer doesn’t mix into the chocolate.
- After adding the peanut butter layer, pour the top layer of melted chocolate carefully, then tap the tray to smooth it out and pop air bubbles.
- Chill fully before removing from liners to keep the cups intact and clean.
Patience and gentle handling bring out the best look and taste in these treats!
Equipment You’ll Need
- Mini muffin tin – I use this to shape the cups perfectly and keep everything neat.
- Mini paper cupcake liners – make cleanup easy and add a cute touch.
- Microwave-safe bowls – for melting the white chocolate evenly without messy spills.
- Back of a spoon – helps spread the chocolate smoothly in the liners.
- Freezer – essential for quick setting and firm cups for easy removal.
Flavor Variations & Add-Ins
- Use dark or milk chocolate instead of white for a richer flavor, or mix chocolates for a layered look.
- Stir in crushed pretzels, chopped nuts, or crispy rice for added texture.
- Add a small dollop of jam or caramel between layers for a sweet surprise.
- Switch peanut butter with almond, cashew, or sunflower seed butter for different nutty flavors.
White Chocolate Peanut Butter Cups
Ingredients You’ll Need:
- 2 cups white chocolate chips or chopped white chocolate
- 1 cup creamy peanut butter (smooth, unsweetened or lightly salted)
- ¼ cup powdered sugar
- ¼ teaspoon salt (optional, if using unsalted peanut butter)
- ½ teaspoon vanilla extract (optional)
- Mini paper cupcake liners
How Much Time Will You Need?
This recipe takes about 15 minutes to prepare, plus around 30 minutes of chilling time in the freezer to make the white chocolate layers firm and set. Overall, in less than an hour, your peanut butter cups will be ready to enjoy!
Step-by-Step Instructions:
1. Prepare Your Muffin Tin:
Line a mini muffin tin with paper cupcake liners. This makes your peanut butter cups easy to handle and helps them keep their shape.
2. Melt and Layer the First White Chocolate Layer:
Place 1 cup of white chocolate chips in a microwave-safe bowl. Microwave in 30-second intervals, stirring after each, until completely melted and smooth. Spoon about 1 teaspoon of the melted white chocolate into the bottom of each liner. Spread it gently and evenly with the back of a spoon. Freeze the tin for about 10 minutes so this base layer firms up.
3. Mix the Peanut Butter Filling:
While the chocolate sets, combine the creamy peanut butter, powdered sugar, salt (if using), and vanilla extract in a medium bowl. Stir until the mixture is smooth and a bit thick. This will be the delicious filling for your cups.
4. Add Peanut Butter Layer:
Once the base white chocolate layer is firm, scoop about 1 teaspoon of the peanut butter mixture onto each cup. Flatten gently with the back of a spoon to make an even layer.
5. Melt and Add the Top White Chocolate Layer:
Microwave the remaining 1 cup of white chocolate chips using the same method as before. Pour the melted white chocolate over the peanut butter layers, covering them completely. Tap the tin lightly on the counter to smooth the tops and remove any air bubbles.
6. Chill to Set:
Return the muffin tin to the freezer for about 20 minutes, or until the peanut butter cups are completely set and firm.
7. Serve and Store:
Remove the cups from the freezer and peel off the paper liners. Store your peanut butter cups in an airtight container in the refrigerator for up to two weeks to keep them fresh and delicious.
Enjoy your creamy, homemade White Chocolate Peanut Butter Cups!
Can I Use Natural Peanut Butter in These Cups?
Yes, you can! Just keep in mind natural peanut butter tends to be thinner, so chilling the peanut butter mixture before assembling helps it hold its shape better.
How Should I Store Leftover Peanut Butter Cups?
Store them in an airtight container in the refrigerator for up to two weeks. They’ll stay firm and delicious — just let them sit at room temperature a few minutes before eating for a softer bite.
Can I Substitute the White Chocolate?
Absolutely! You can use milk or dark chocolate instead if you prefer. Just be sure to melt and handle the chocolate gently to avoid burning or seizing.
Do I Need a Muffin Tin to Make These?
While a mini muffin tin helps shape the cups nicely, you can also use silicone molds or simply mini cupcake liners placed on a baking sheet.