Skillet Pork Chops are a quick and tasty way to make dinner feel special without spending hours in the kitchen. Juicy pork chops get a beautiful golden-brown crust from cooking right in the skillet, locking in lots of flavor. A simple seasoning of salt and pepper or some garlic and herbs really brings out their natural goodness.
I love making these because they come together so easily, and I can add whatever side I have on hand—sometimes mashed potatoes, sometimes a fresh salad. One tip I’ve found helpful is to let the pork chops rest a few minutes after cooking; it keeps them tender and juicy every time.
These skillet pork chops remind me of those cozy weeknight meals when everyone’s hungry and ready to eat, but you still want something tasty and comforting. It’s one of those dishes that feels homemade and satisfying without needing a lot of fuss. I hope you enjoy them just as much as my family does!
Key Ingredients & Substitutions
Pork Chops: Bone-in chops add extra flavor and stay juicy; boneless work well too and cook a bit faster. Choose chops about 1-inch thick for even cooking.
Garlic Powder & Paprika: These simple spices boost flavor without overpowering. If you’re out of paprika, try smoked paprika for a subtle smoky note or chili powder for a bit more kick.
Butter & Oil: Using both helps create a great crust and adds richness. Olive oil is my go-to, but vegetable or avocado oil are good high-heat options.
Chicken Broth: It makes a tasty pan sauce by lifting up those brown bits. If you want vegetarian, vegetable broth is a good stand-in.
Rosemary & Parsley: Fresh herbs brighten the dish. If you only have dried rosemary, use about half the amount since dried herbs are stronger.
How Do You Get a Perfect Golden Crust on Pork Chops?
The secret to a great crust is dry chops and hot oil:
- Pat pork chops dry with paper towels to remove moisture—wet chops won’t brown well.
- Season well with salt and spices before cooking.
- Heat the skillet and oil until shimmering, but not smoking, then add chops without crowding.
- Cook undisturbed for 4-5 minutes per side to form that golden-brown crust.
- Don’t flip too soon—letting them sear properly locks in juices and flavor.
After browning, adding butter and garlic for basting adds both flavor and moisture, making the pork chops tender and tasty.
Equipment You’ll Need
- Heavy skillet (preferably cast iron) – I like it because it heats evenly and gives the pork chops a nice sear.
- Tongs – they make flipping the chops easy without poking holes or losing juices.
- Meat thermometer – helps ensure the pork is cooked to the right temperature (145°F/63°C).
- Wooden spoon or spatula – good for scraping up browned bits and stirring the sauce.
Flavor Variations & Add-Ins
- Use apple cider or apple juice instead of chicken broth for a slightly sweet sauce that pairs well with pork.
- Add a splash of soy sauce or Worcestershire sauce to enhance umami flavor.
- Sprinkle on thyme or sage instead of rosemary for different herbal notes.
- Finish with a squeeze of lemon or a splash of vinegar for a bright, tangy finish.
How to Make Skillet Pork Chops
Ingredients You’ll Need:
- 4 bone-in or boneless pork chops (about 1-inch thick)
- Salt and freshly ground black pepper, to taste
- 1 teaspoon garlic powder
- 1 teaspoon paprika
- 2 tablespoons olive oil or vegetable oil
- 2 tablespoons unsalted butter
- 2 cloves garlic, minced
- ½ cup chicken broth
- 1 teaspoon fresh rosemary (or ½ teaspoon dried)
- Fresh parsley, chopped (for garnish)
Time You’ll Need:
This recipe takes about 10 minutes to prep and 15 minutes to cook, with a short resting period of 3-5 minutes—so around 30 minutes total. It’s quick enough for a busy weeknight but special enough to enjoy anytime!
Step-by-Step Instructions:
1. Season the Pork Chops:
Begin by patting your pork chops dry with paper towels. This helps them get a nice crust when cooking. Season both sides generously with salt, pepper, garlic powder, and paprika for a tasty, well-rounded flavor.
2. Sear the Chops:
Heat olive oil in a heavy skillet over medium-high heat until it’s hot but not smoking. Place the pork chops in the pan without overcrowding. Let them cook without moving for 4-5 minutes until the bottom side is golden-brown and caramelized.
3. Flip and Add Flavor:
Turn the pork chops over and add the butter and minced garlic to the skillet. As the butter melts, spoon the garlic butter over the pork chops while they cook another 4-5 minutes. Cook until the internal temperature reads 145°F (63°C).
4. Make the Pan Sauce:
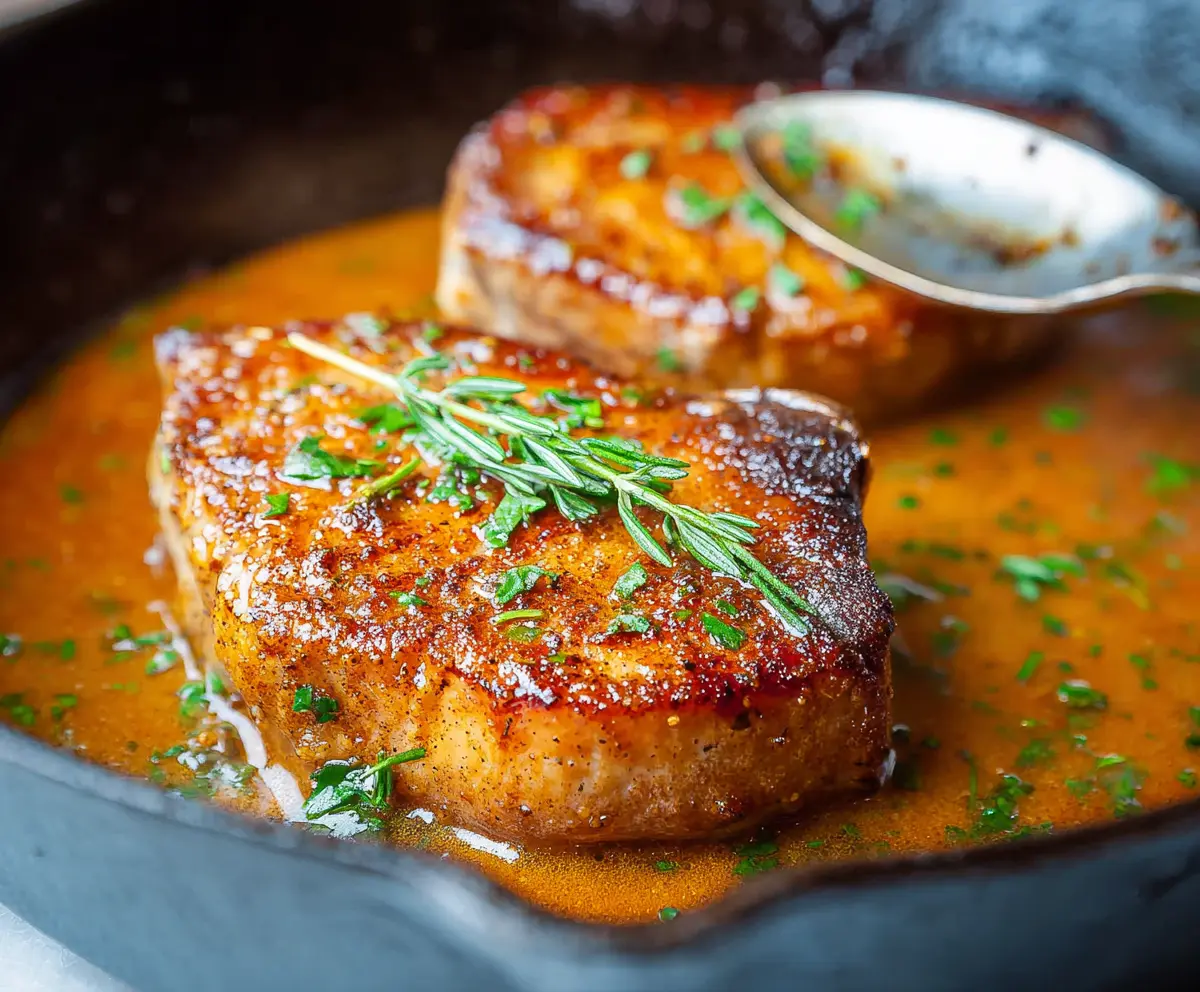
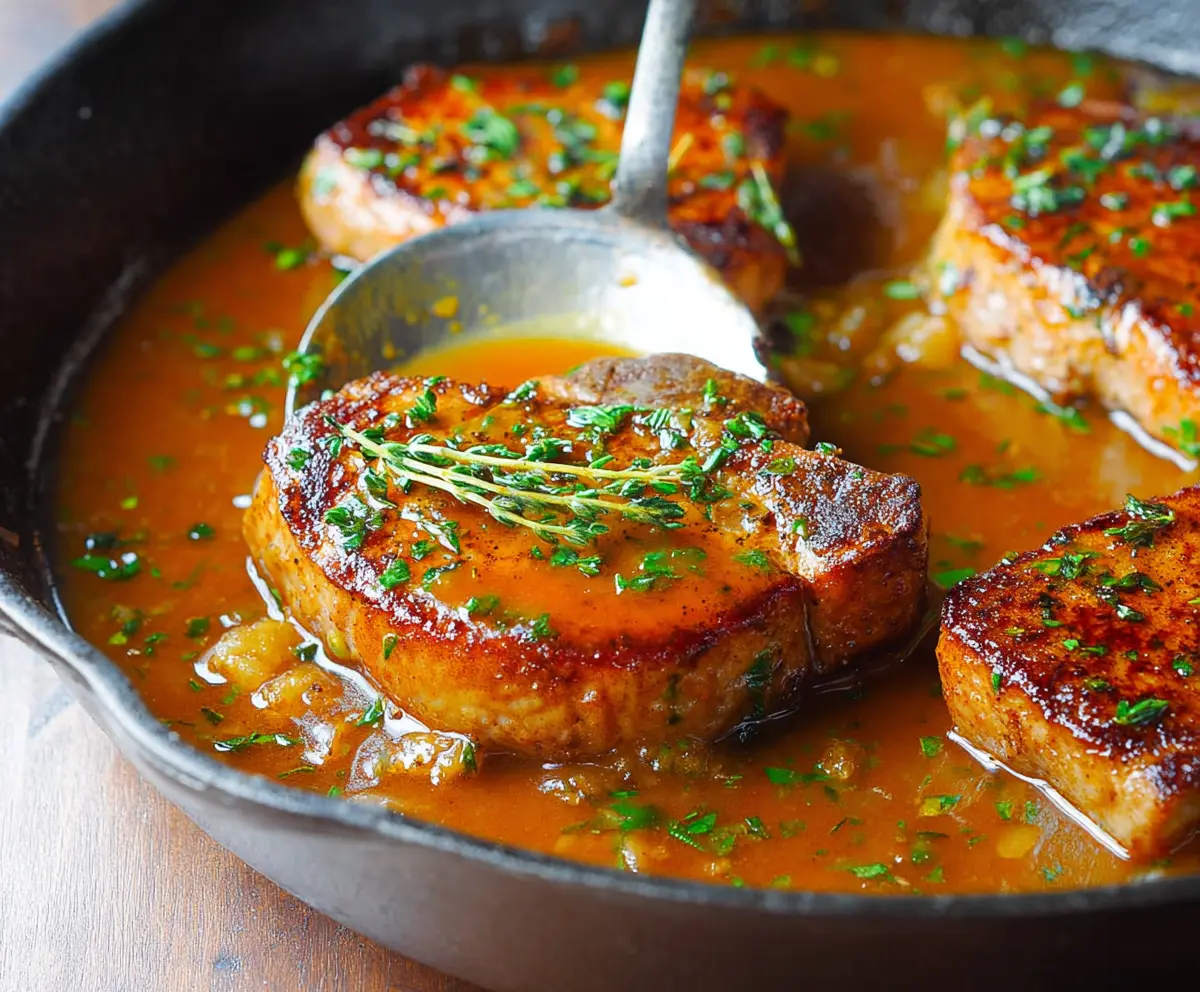
Remove the pork chops to a plate and pour the chicken broth into the hot skillet. Use a wooden spoon to scrape up all those delicious browned bits from the bottom of the pan. Stir in fresh rosemary and let the sauce simmer and thicken for 2-3 minutes.
5. Finish and Serve:
Return the pork chops to the skillet and spoon the sauce over them. Garnish with freshly chopped parsley and a sprig of rosemary. Let the pork chops rest for 3-5 minutes to keep them juicy. Then serve warm, spooning more sauce over the top. Enjoy!
Can I Use Frozen Pork Chops for This Recipe?
Yes, but make sure to fully thaw them in the refrigerator overnight before cooking. Pat them dry thoroughly to get a good sear and avoid excess moisture in the pan.
How Should I Store Leftover Skillet Pork Chops?
Store leftovers in an airtight container in the fridge for up to 3 days. Reheat gently in a skillet over medium-low heat or in the microwave to keep them tender.
Can I Substitute the Chicken Broth?
Absolutely! You can use vegetable broth, beef broth, or even water mixed with a bit of soy sauce or Worcestershire sauce to add flavor to the pan sauce.
What’s the Best Way to Tell When Pork Chops Are Done?
The safest and most accurate method is to use a meat thermometer. Pork chops should reach an internal temperature of 145°F (63°C) for juicy, safe-to-eat meat.