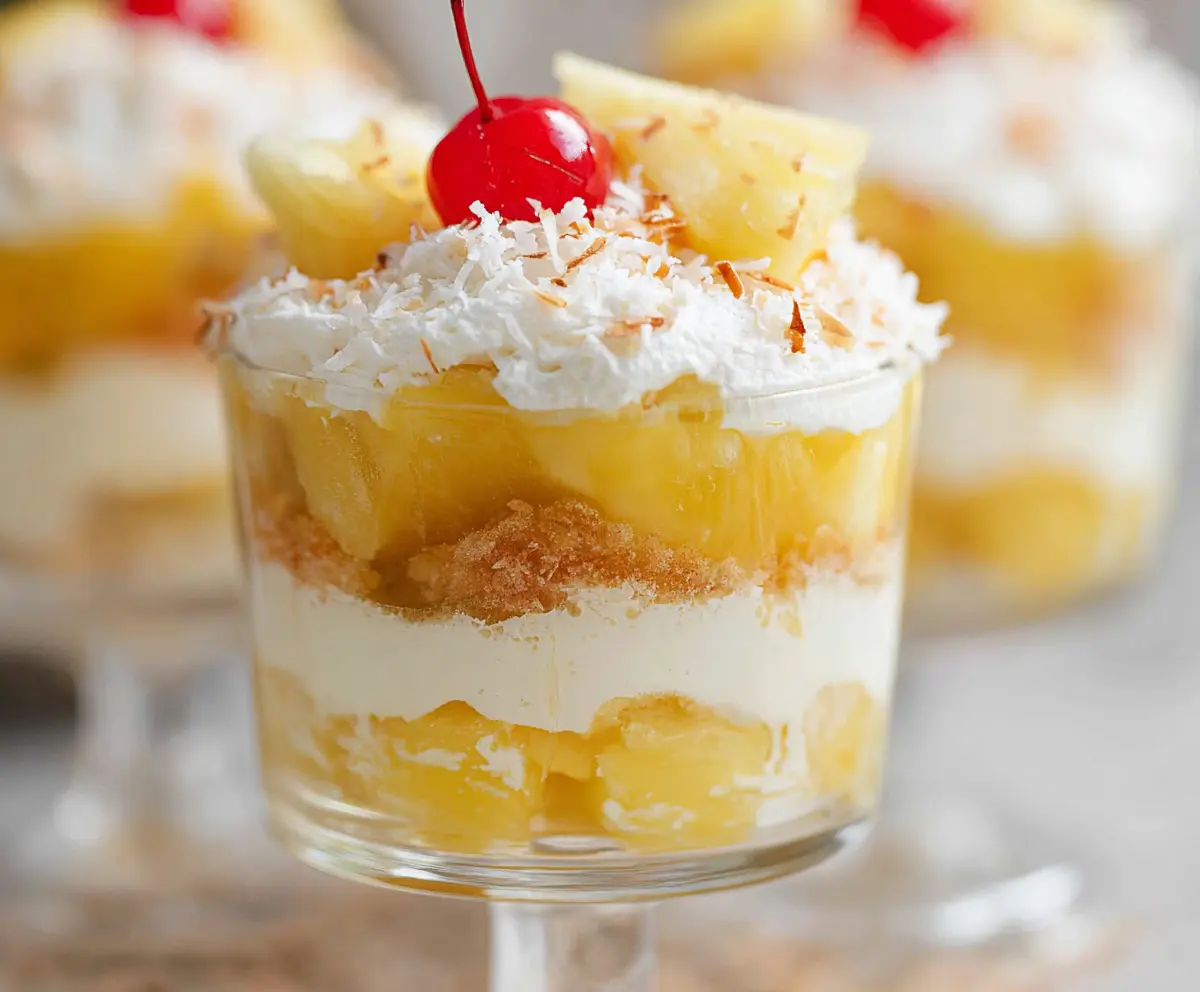
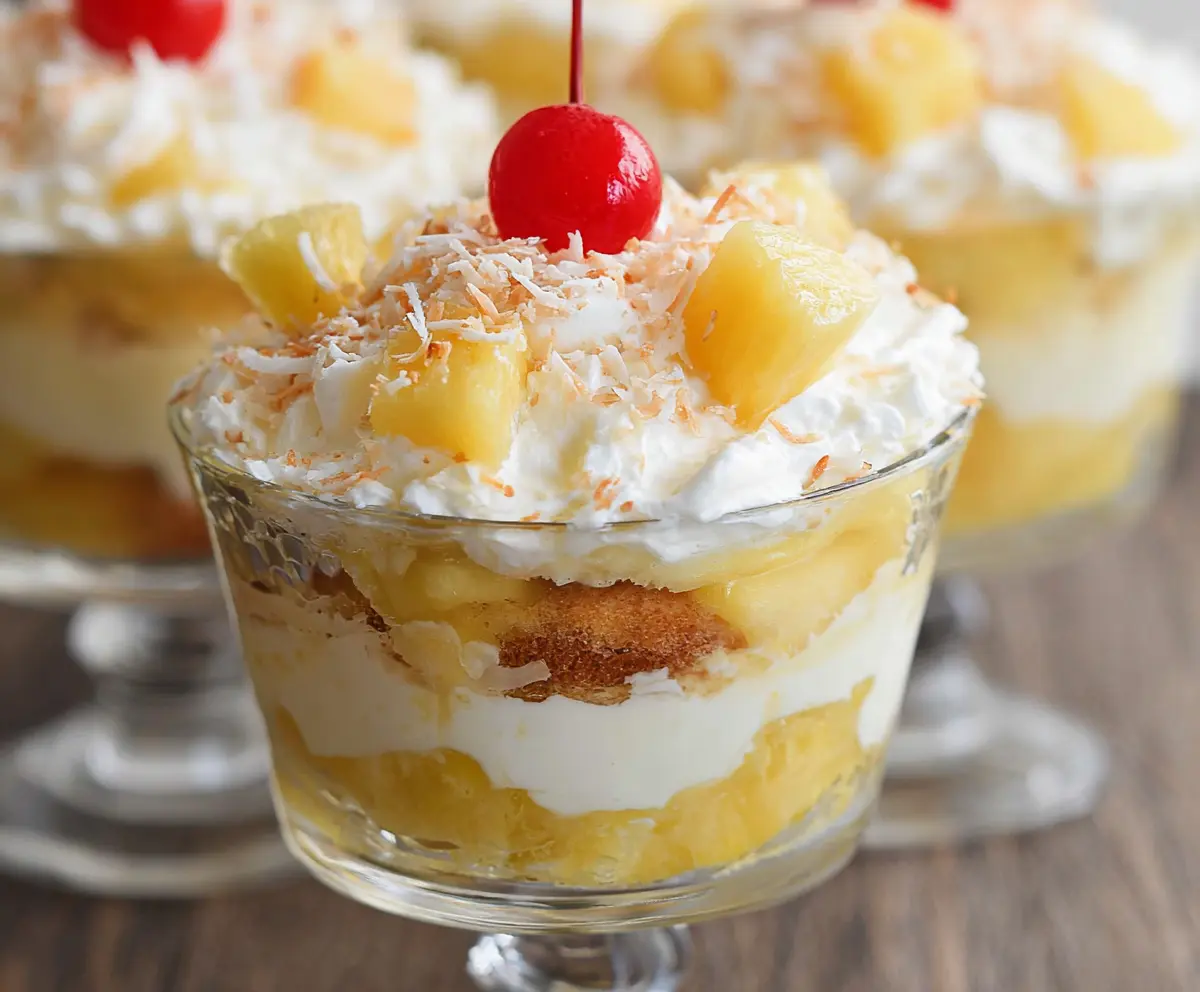
Pineapple Coconut Sunshine Trifle Cups are like little bites of tropical happiness! They combine sweet pineapple, creamy coconut, and fluffy cake layers all in one handy cup. The mix of juicy fruit and smooth coconut cream makes each spoonful bright and refreshing, perfect for a warm day or a cheerful dessert anytime.
I love making these trifle cups because they’re simple to put together but always feel special. Using individual cups means no fussing with big slices, and everyone gets their own perfect portion. I usually add a sprinkle of toasted coconut on top for a little crunch—it’s such a nice touch that brings the flavors together beautifully.
These trifle cups are great for summer get-togethers or even just a sweet treat to brighten up a regular day. I’ve noticed that whenever I bring them along, they disappear fast, and people always ask for the recipe. Plus, they’re easy to make ahead, so you can spend more time enjoying the company and less time in the kitchen.
Key Ingredients & Substitutions
Pineapple: Fresh pineapple is best for natural sweetness and a nice texture. If fresh isn’t available, canned pineapple (in juice, not syrup) works well too. Just drain it well to avoid soggy layers.
Cream Cheese & Heavy Cream: These create the creamy, smooth filling. Use full-fat cream cheese and cold heavy cream for the best whipping results. For a lighter option, try mascarpone cheese or Greek yogurt, but texture will change slightly.
Powdered Sugar & Vanilla Extract: Powdered sugar blends smoothly with cream cheese, ensuring no graininess. Vanilla extract adds warmth, but coconut extract is a lovely optional touch to boost the tropical flavor.
Graham Crackers & Toasted Coconut: Graham crackers add crunch and a bit of sweetness, balancing the creamy layers. If gluten-free is needed, substitute with gluten-free cookies. Toasted shredded coconut offers texture and flavor; you can also use unsweetened coconut if preferred.
Garnish (Cherries & Pineapple chunks): These brighten up the presentation and add a pop of color. Maraschino cherries can be swapped with fresh cherries or a small piece of pineapple for a natural look.
How Do You Get the Cream Cheese and Whipped Cream Mixture Just Right?
The creamy coconut filling is the heart of these trifle cups, and getting the texture perfect means smooth, fluffy layers that blend beautifully with other ingredients.
- Make sure the cream cheese is softened to room temperature—this helps it mix easily and avoid lumps.
- Beat the cream cheese with powdered sugar and extracts until fully smooth before folding in whipped cream.
- Whip the heavy cream to stiff peaks by chilling your bowl and beaters first. This helps the cream hold shape better.
- When folding the whipped cream into the cream cheese, do it gently with a spatula using a folding motion. This keeps the mixture light and airy without deflating the cream.
- If the mixture looks too stiff, a splash of milk can help loosen it slightly.
Equipment You’ll Need
- Mixing bowls – I recommend using a large bowl for whipping cream and a smaller one for mixing the cream cheese mixture; they make prepping easier.
- Hand or stand mixer – helps you whip the heavy cream to stiff peaks effortlessly.
- Spatula – great for folding ingredients gently without deflating the whipped cream.
- Serving cups or small glasses – perfect for creating individual trifle servings that look pretty and are easy to serve.
- Measuring cups and spoons – ensure your ingredients are just right for the layers.
- Grater or toaster for shredding and toasting coconut – adds flavor and crunch, and makes the topping extra special.
Flavor Variations & Add-Ins
- Protein swap: Substitute pineapple with diced mango or peaches for a different tropical twist.
- Cheese twist: Use mascarpone or cream cheese mixed with Greek yogurt for a lighter, tangier flavor.
- Additional fruits: Toss in blueberries, strawberries, or kiwi slices for more colorful layers and fresh taste.
- Spice it up: Add a pinch of cinnamon or nutmeg to the cream mixture for warm, cozy flavors.
Equipment You’ll Need
- Mixing bowls – one large for whipping cream and one for the cream cheese mixture
- Hand mixer or stand mixer – to easily whip the heavy cream
- Spatula – for gently folding the cream into the cream cheese mixture
- Measuring cups and spoons – to measure ingredients accurately
- Serving cups or small glasses – to build individual trifle cups
- Baking sheet or skillet (optional) – for toasting shredded coconut
Flavor Variations & Add-Ins
- Fruit swaps: Use mango, peaches, or kiwi instead of pineapple for different tropical flavors.
- Cheese options: Try mascarpone or Greek yogurt mixed with the cream cheese for a lighter or tangier filling.
- Extra fruits: Add blueberries, strawberries, or raspberries between layers for a colorful and fresh twist.
- Spiced flavor: Mix a pinch of cinnamon or nutmeg into the cream cheese layer for a warm hint of spice.
- Crunch variations: Swap graham crackers for crushed vanilla wafers or gluten-free cookies if preferred.
Can I Use Canned Pineapple Instead of Fresh?
Yes, canned pineapple works great! Just be sure to drain it well to avoid making the trifle soggy.
How Long Can I Make These Trifle Cups Ahead?
You can prepare them up to 24 hours in advance. Keep them covered in the fridge to maintain freshness and let the flavors meld nicely.
Can I Substitute the Cream Cheese?
Absolutely! Mascarpone or a blend of cream cheese and Greek yogurt can be used for a lighter texture, though the taste will be slightly different.
What’s the Best Way to Store Leftovers?
Store leftovers in an airtight container in the fridge for up to 3 days. Give them a gentle stir before serving if the layers separate a bit.