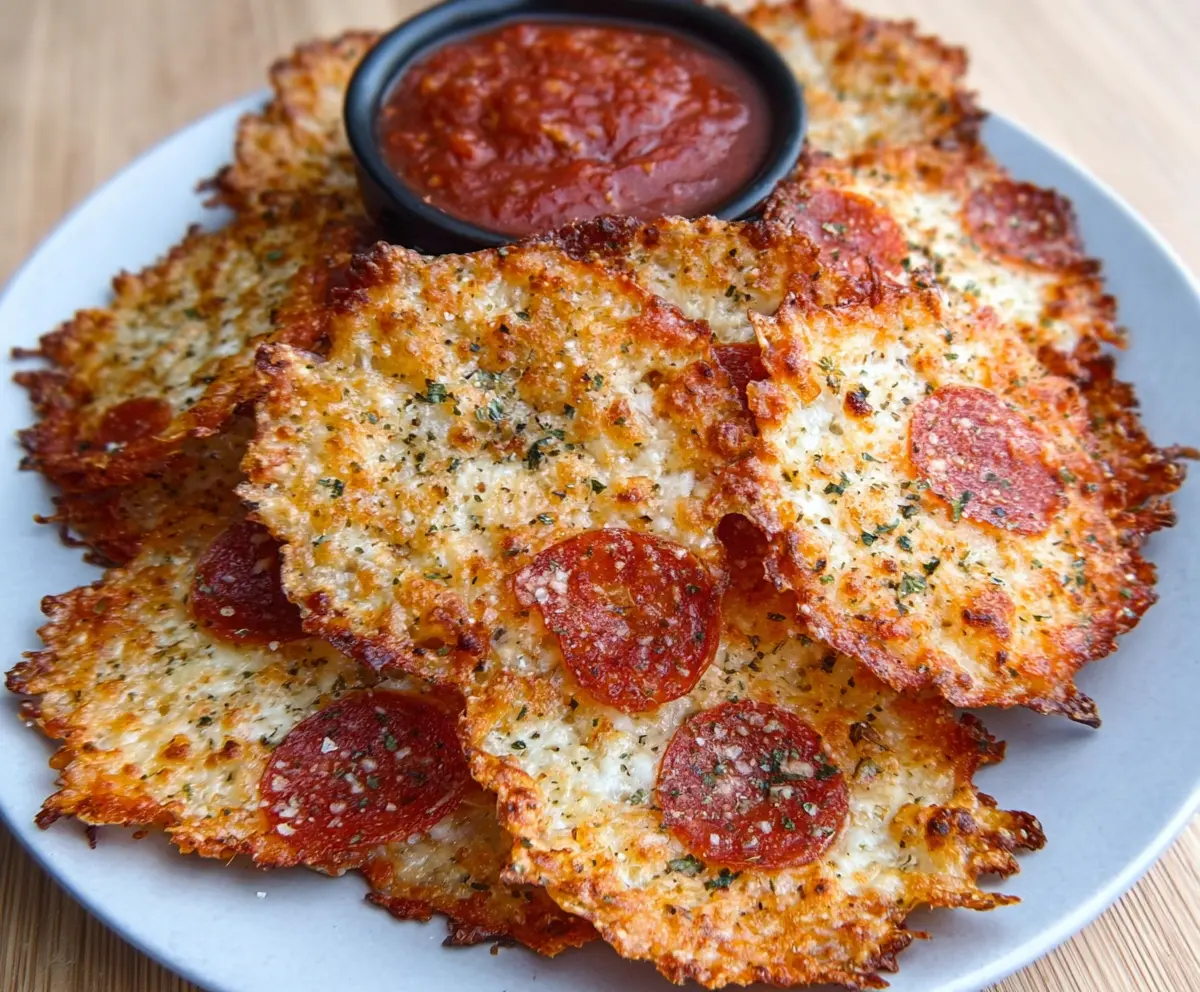
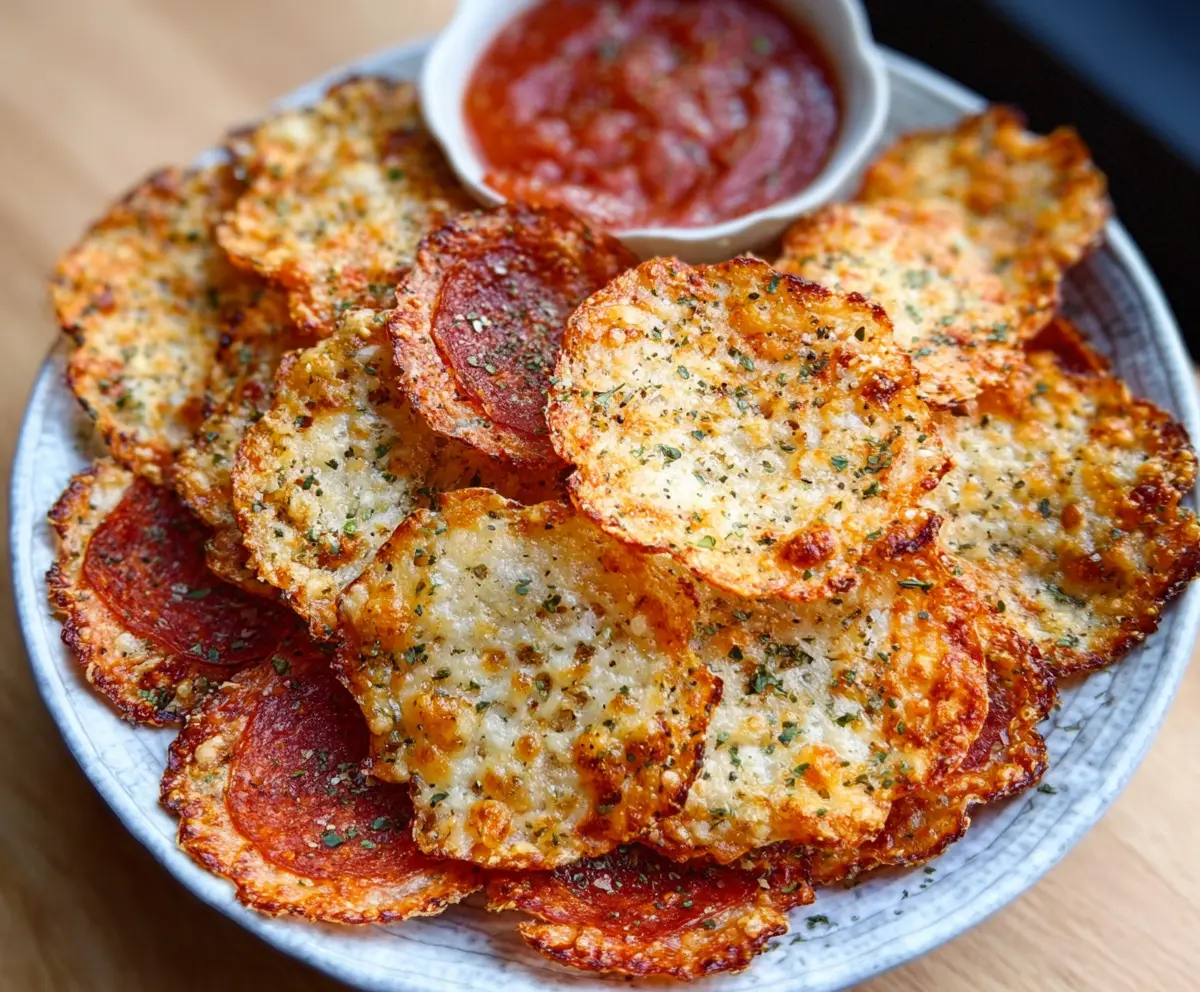
Crispy Pizza Chips are crunchy, cheesy bites that bring all the best flavors of pizza in a fun chip form. Think golden, crunchy edges, melty cheese, and classic pizza seasonings like oregano, garlic, and a touch of tomato sauce—basically pizza meets snack time in the best way.
I love making these pizza chips when I want something quick but satisfying. They’re great for parties or when I’m just craving something easy to munch on without all the mess of a slice. Plus, they’re perfect for dipping in extra marinara or ranch—because who doesn’t love a little dip on the side?
Serving these crispy pizza chips as a snack or appetizer always gets people smiling and reaching for more. I like to keep a batch ready in the fridge for movie nights or casual get-togethers. They’re simple to make but feel special enough to share, and they never last long around here!
Key Ingredients & Substitutions
Mozzarella Cheese: This is the main star for that melty, gooey texture. I prefer whole milk mozzarella for richer flavor. If you want a lighter option, part-skim mozzarella works, but the chips might be less gooey.
Parmesan Cheese: Adds a nice sharpness and helps with crisping. You can swap it for Pecorino Romano if you like a saltier, tangier kick. Avoid pre-grated cheese with additives; freshly grated melts better.
Italian Seasoning & Garlic Powder: These bring classic pizza flavor to the chips. If you don’t have Italian seasoning, oregano or a mix of basil, thyme, and rosemary works well. Garlic powder is easier here than fresh garlic for even flavor.
Pepperoni: Mini pepperoni gives a fun, bite-sized pizza feel. You can skip it or substitute with chopped olives, sun-dried tomatoes, or cooked sausage for different toppings.
How Do You Get Pizza Chips Crispy Without Burning?
Getting that perfect crispy edge while keeping the center melty is all about even spreading and the right oven temperature. Here’s how I do it:
- Flatten cheese mounds evenly, about 1 tablespoon, so they cook uniformly and don’t clump.
- Bake at 400°F (200°C)—hot enough to brown edges quickly without drying out the whole chip.
- Watch carefully during the last couple of minutes; cheese can burn fast once edges turn golden brown.
- Let chips cool on the baking sheet; they crisp more as they rest.
If you want extra crispness, try flipping the chips halfway through baking, but be gentle—they can break easily when hot.
Equipment You’ll Need
- Baking sheet with parchment paper or silicone mat – I prefer this because it prevents sticking and makes cleanup easier.
- Mixing bowl – helps you combine the cheeses and seasonings evenly.
- Spoon – perfect for scooping out and flattening the cheese mounds.
- Spatula or tongs – useful for transferring crispy chips without breaking them.
Flavor Variations & Add-Ins
- Replace mini pepperoni with chopped olives, cooked sausage, or sun-dried tomatoes for different tastes.
- Sprinkle with crushed red pepper or a dash of hot sauce to add some heat.
- Use different cheeses like cheddar or pepper Jack for extra flavor and color.
- Add a sprinkle of fresh basil or oregano after baking for a fresh herbal touch.
Crispy Pizza Chips
Ingredients You’ll Need:
- 2 cups shredded mozzarella cheese
- 1/4 cup grated Parmesan cheese
- 1/2 teaspoon garlic powder
- 1/2 teaspoon Italian seasoning (or dried oregano)
- Salt, to taste
- Mini pepperoni slices (about 20 slices)
- Marinara sauce, for dipping
How Much Time Will You Need?
This recipe takes about 10 minutes to prepare and just 6-8 minutes to bake, so you’ll have a tasty snack ready in under 20 minutes. Plus, a few minutes of cooling time help make the chips extra crispy.
Step-by-Step Instructions:
1. Preheat and Prepare:
Start by heating your oven to 400°F (200°C). Line a baking sheet with parchment paper or a silicone baking mat to keep the chips from sticking and make clean-up easier.
2. Mix the Cheese & Seasonings:
In a bowl, combine shredded mozzarella, grated Parmesan, garlic powder, Italian seasoning, and a pinch of salt. Stir everything well to make sure the flavors are evenly mixed.
3. Shape the Chips:
Scoop small mounds (about 1 tablespoon each) of the cheese mixture onto the prepared baking sheet. Flatten each mound slightly with the back of your spoon to create round chip shapes. Press 2-3 mini pepperoni slices gently on top of each chip.
4. Bake Until Crispy:
Place the baking sheet in the oven and bake for 6 to 8 minutes. Watch closely as the cheese melts and the edges turn a lovely golden brown and crispy.
5. Cool and Serve:
Carefully take the chips out of the oven and let them cool on the baking sheet for a few minutes. This cooling step helps the chips crisp up nicely. Then, use a spatula to transfer them to a serving plate.
6. Enjoy with Dipping Sauce:
Serve your crispy pizza chips warm with a side of marinara sauce for dipping. They make a perfect crunchy, cheesy snack or appetizer for any time you want pizza flavors in a fun new way!
Can I Make Crispy Pizza Chips Without Pepperoni?
Absolutely! You can leave out the pepperoni or substitute it with toppings like olives, sun-dried tomatoes, or cooked sausage. The chips will still be delicious and crispy.
How Should I Store Leftover Pizza Chips?
Store any leftovers in an airtight container at room temperature for up to 2 days. To refresh their crispiness, pop them in a preheated oven at 350°F (175°C) for a few minutes before serving.
Can I Use Pre-Shredded Cheese for This Recipe?
You can, but freshly shredded cheese melts better and helps the chips crisp up more evenly. If using pre-shredded cheese, look for brands without anti-caking agents for the best results.
Is It Possible to Make These Chips Gluten-Free?
Yes! This recipe is naturally gluten-free since it uses only cheese and seasonings. Just be sure your seasonings and pepperoni slices don’t contain any hidden gluten additives.