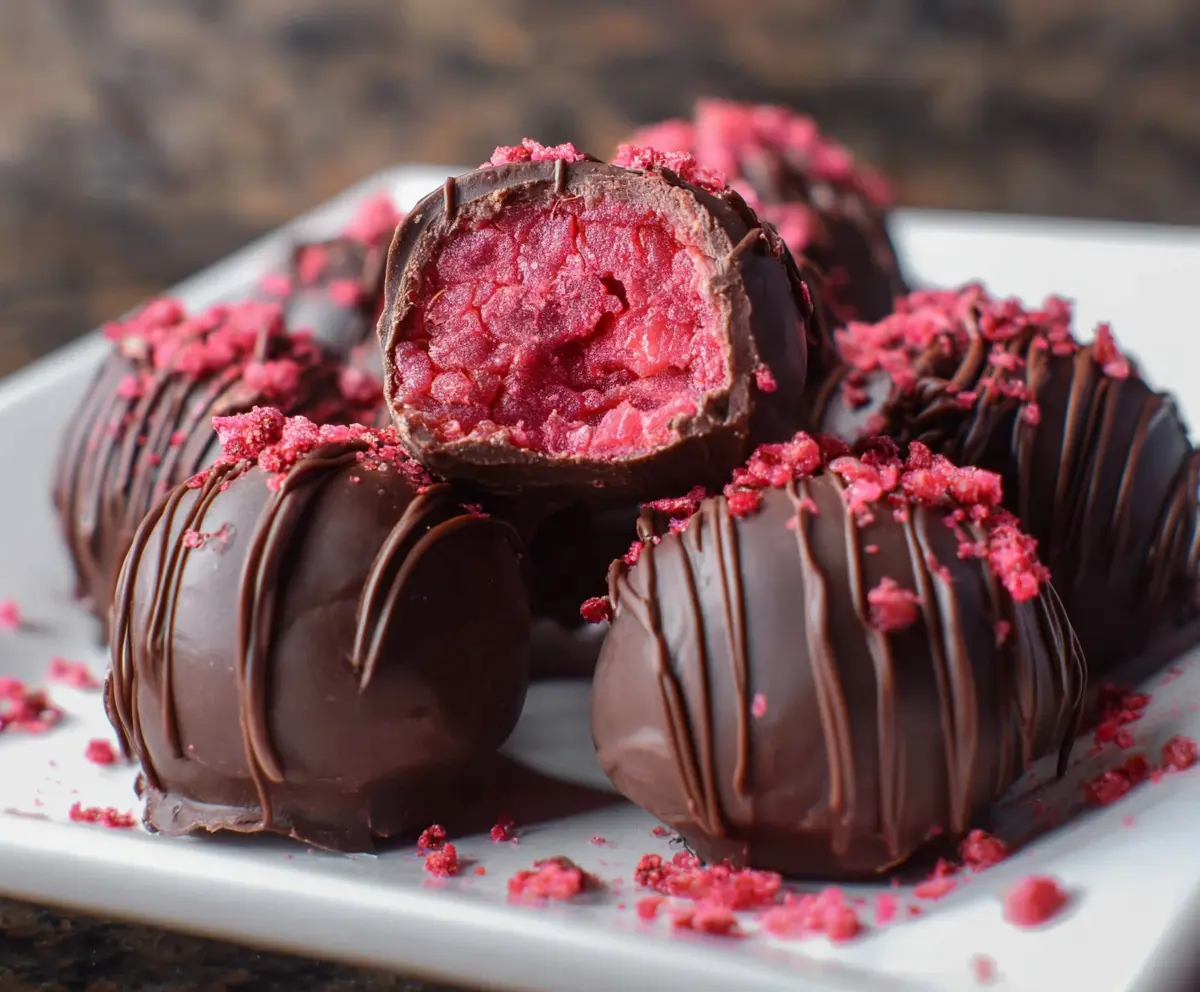
Chocolate-Covered Strawberry Buttercreams are little sweet bites that bring together the smooth richness of buttercream with the bright, juicy flavor of strawberries, all wrapped in a shiny layer of chocolate. These treats are like a mini celebration for your taste buds, combining creamy, fruity, and chocolatey textures in every bite.
I love making these because they’re just the right size for sharing (or not!). The strawberry buttercream inside feels fresh and fun, and coating them with chocolate adds that perfect touch of richness. My favorite part is how easy they are to eat—no mess, just pure yum. Plus, they make a great gift or party snack because they look so pretty and feel special without a lot of fuss.
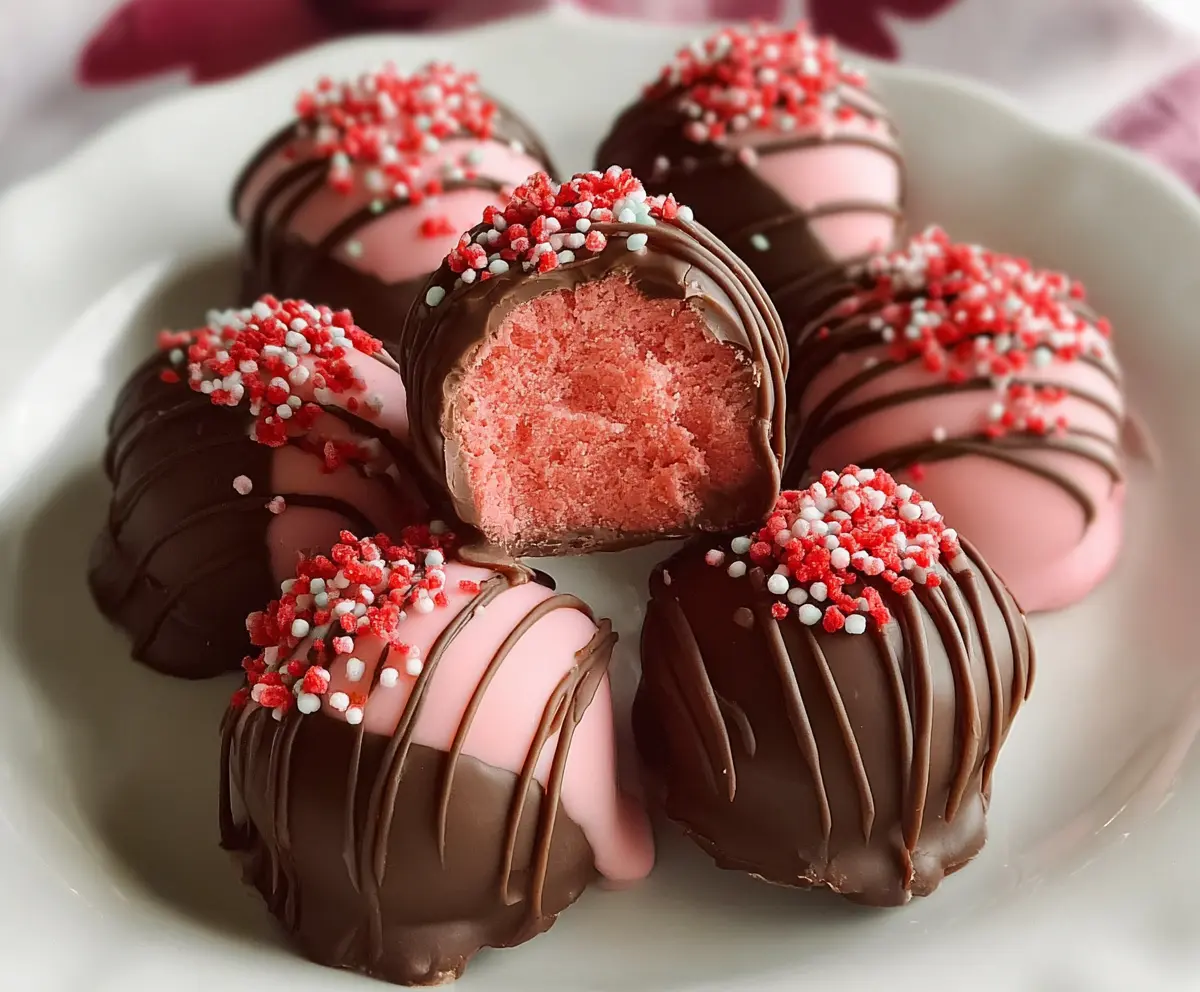
When I serve these, I like to arrange them on a simple white plate so the colors really pop, maybe with a few fresh strawberries on the side for an extra hint of freshness. They’re perfect for afternoon tea, birthday parties, or just as a quick treat when you need a little pick-me-up. Honestly, these chocolate-covered strawberry buttercreams remind me of warm spring days and happy moments with friends, making any day feel a bit sweeter.
Key Ingredients & Substitutions
Butter: Using unsalted butter lets you control the sweetness better. Make sure it’s softened to cream easily. If you want a dairy-free option, try vegan butter but note the texture might change slightly.
Freeze-Dried Strawberries: These add real strawberry flavor without adding moisture. If you can’t find them, you could use strawberry jam, but reduce any extra liquid to keep the buttercream firm.
Powdered Sugar: This sweetens and thickens the buttercream. If you prefer less sweetness, you can reduce a little, but it may affect texture.
Chocolate for Coating: Semi-sweet or dark chocolate works great for a nice contrast. Candy melts add color variety but can be sweeter. Use good quality chocolate to get a smooth coating.
How Do I Get the Chocolate Coating Smooth and Shiny?
Coating buttercream balls with chocolate is a bit tricky but fun once you get the hang of it:
- Make sure the buttercream balls are well chilled; this helps the chocolate harden quickly and keeps the center firm.
- Temper your chocolate or melt it slowly in short bursts and stir well to avoid burning.
- Use a fork or dipping tool to fully submerge each buttercream ball, then lift and gently tap off the excess chocolate.
- Place dipped balls on parchment paper quickly to set, avoiding touching the coating until firm.
- If you want a glossy finish, you can gently warm the chocolate coating before dipping or use a little coconut oil to smooth it out.
Practice helps! If the chocolate thickens too fast, remelt carefully and keep dipping fast to get a nice shell. Enjoy the process and the tasty results!
Equipment You’ll Need
- Mixing bowls – I like these for easy stirring and mixing your ingredients smoothly.
- Measuring cups and spoons – helps you get the perfect amounts every time.
- Parchment paper – makes clean-up easy and keeps your buttercream balls from sticking.
- Chocolate melting bowls or microwave-safe bowls – for melting chocolate smoothly without burning.
- Dipping tools or forks – help you coat the buttercream balls evenly with chocolate.
- Refrigerator – needed to chill the buttercream and set the chocolate coating quickly.
Flavor Variations & Add-Ins
- Orange zest or extract – adds a fresh citrus note that pairs nicely with strawberries and chocolate.
- White chocolate coating – makes for a sweeter, creamier look and taste, perfect for springtime treats.
- Milk chocolate and caramel drizzle – creates a richer, more indulgent flavor combo.
- Crushed pistachios or almonds – sprinkle on top before the chocolate sets for crunch and a nutty twist.
How to Make Chocolate-Covered Strawberry Buttercreams
Ingredients You’ll Need:
For the Strawberry Buttercream:
- 1/2 cup unsalted butter, softened
- 2 cups powdered sugar, sifted
- 2 tbsp heavy cream
- 1 tsp vanilla extract
- 1/4 cup freeze-dried strawberries, finely crushed into powder
- Pink or red food coloring (optional, for a more intense color)
For the Coating:
- 12 oz semi-sweet or dark chocolate, for coating
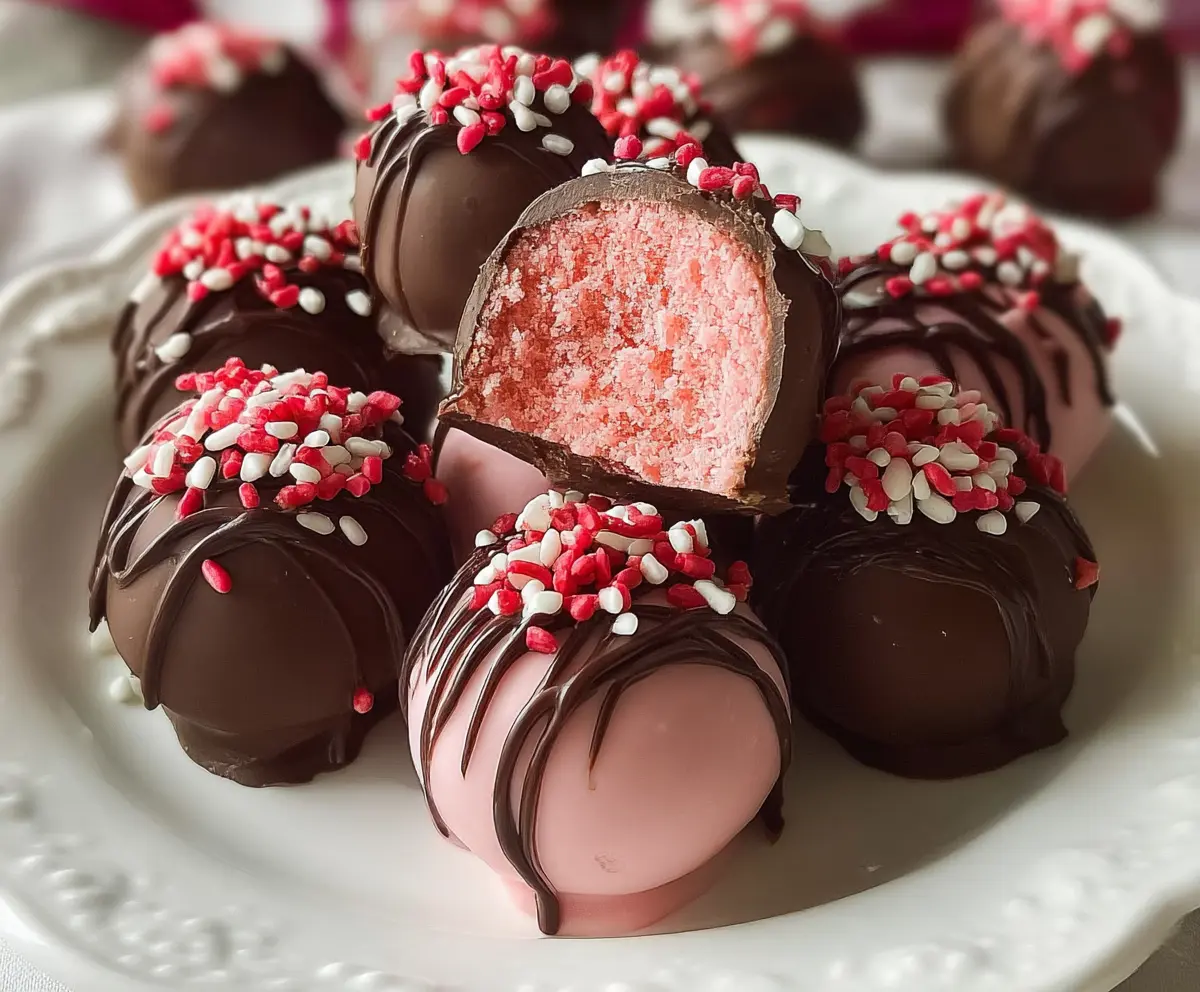
- 4 oz pink candy melts or white chocolate tinted with pink food coloring (optional)
- Sprinkles or crushed freeze-dried strawberries for garnish
How Much Time Will You Need?
This whole recipe takes about 2 to 2 ½ hours. Prep and mixing take about 20 minutes, chilling the buttercream balls takes at least 1 hour, then dipping and decorating need another 30 minutes including the final chilling for the chocolate to harden. It’s worth the wait for these tasty treats!
Step-by-Step Instructions:
1. Make the Strawberry Buttercream:
In a big bowl, beat your softened butter with an electric mixer on medium speed. After about 1 to 2 minutes, the butter should look smooth and creamy. Next, slowly add the powdered sugar, half a cup at a time, making sure to beat well after each addition. Pour in the heavy cream and vanilla, then keep beating until the mixture is light and fluffy. Now stir in the crushed freeze-dried strawberries and a few drops of pink or red food coloring until your buttercream has a lovely pink shade and even strawberry flavor.
2. Shape and Chill the Buttercream Balls:
Scoop small spoonfuls of the strawberry buttercream and roll them between your hands to make small, smooth balls about a teaspoon in size. Line a baking sheet with parchment paper and place the balls on it. Put the tray in the refrigerator for at least 1 hour so the buttercream firms up, making it easier to coat with chocolate later.
3. Melt the Chocolate for Coating:
While the buttercream chills, melt the semi-sweet or dark chocolate in a microwave-safe bowl, heating in 30-second bursts and stirring in between until smooth. If you want some of your buttercream balls coated in pink, melt the candy melts or white chocolate tinted with pink food coloring the same way.
4. Dip the Buttercream Balls in Chocolate:
Take the chilled buttercream balls from the fridge. Using a fork or dipping tool, dip each ball fully into the melted chocolate to coat it. Let the extra chocolate drip off before placing them back on the parchment paper. For the pink-coated balls, dip them into the pink chocolate similarly.
5. Add Decorations and Set the Chocolate:
Before the chocolate hardens, drizzle melted dark chocolate over pink-coated balls if you want a fancy touch. Then sprinkle red and white sprinkles or crushed freeze-dried strawberries on top for a festive look. Once decorated, place all the buttercreams back in the fridge for about 30 minutes so the chocolate shell becomes firm and crisp.
6. Serve and Enjoy!
Your chocolate-covered strawberry buttercreams are ready to enjoy! Serve them chilled or let them sit at room temperature for a few minutes before eating. They make a delicious and elegant treat perfect for sharing or gifting.
Can I Use Fresh Strawberries Instead of Freeze-Dried?
It’s best to use freeze-dried strawberries because they’re dry and won’t add moisture that could make the buttercream too soft. If you only have fresh strawberries, try reducing any added liquid and finely pureeing them, but the texture might be less firm.
How Should I Store These Buttercreams?
Store them in an airtight container in the refrigerator for up to 5 days. Let them come to room temperature a few minutes before serving for the best flavor and texture.
Can I Make These Buttercreams Ahead of Time?
Yes! You can prepare the buttercream balls and keep them chilled for up to a day before dipping in chocolate. After coating, refrigerate them until ready to serve.
What If I Don’t Have Candy Melts? Can I Use Regular Chocolate?
Absolutely! Regular white chocolate will work fine and you can tint it with food coloring if you want that pretty pink look. Just melt it gently to avoid burning.