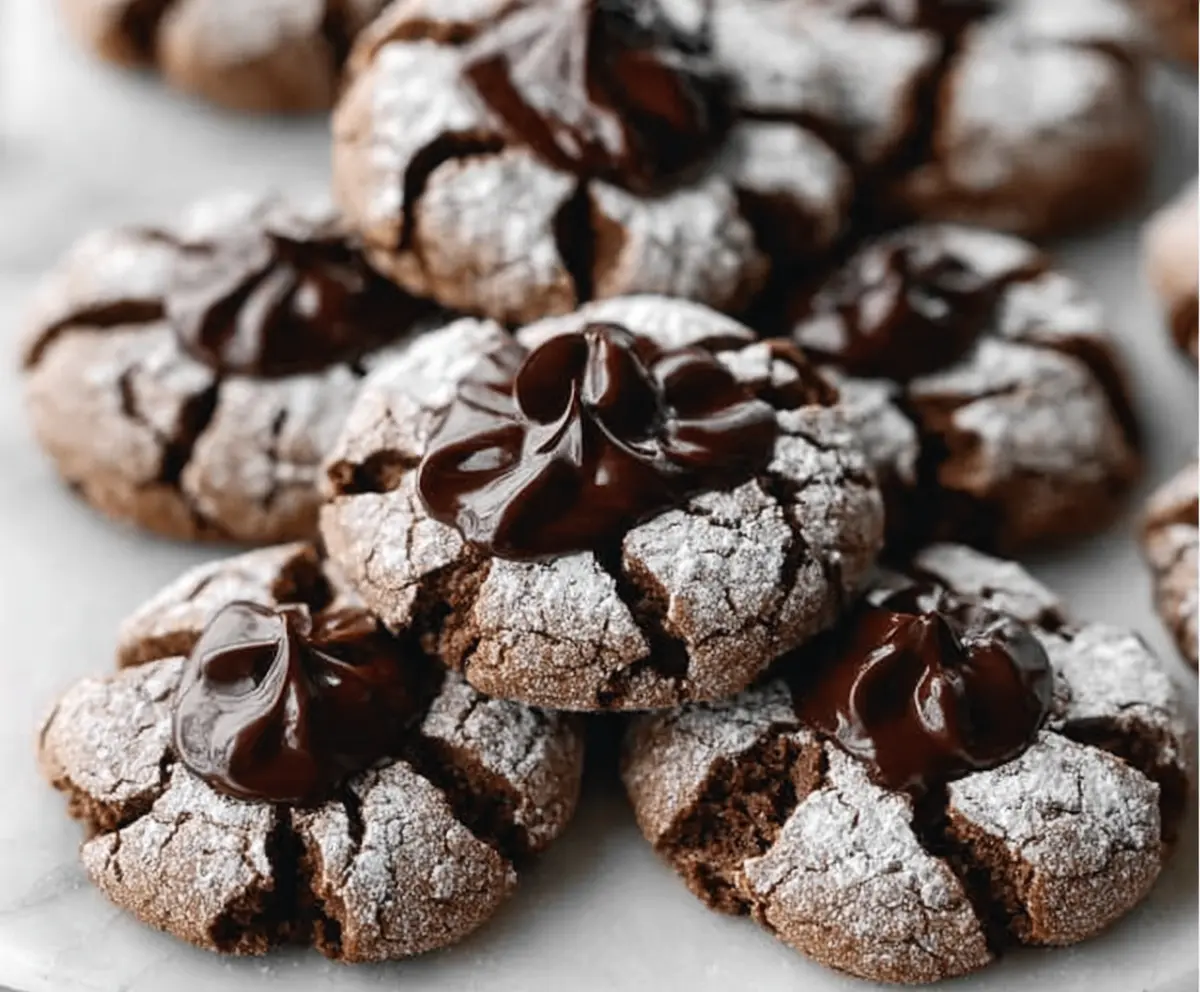
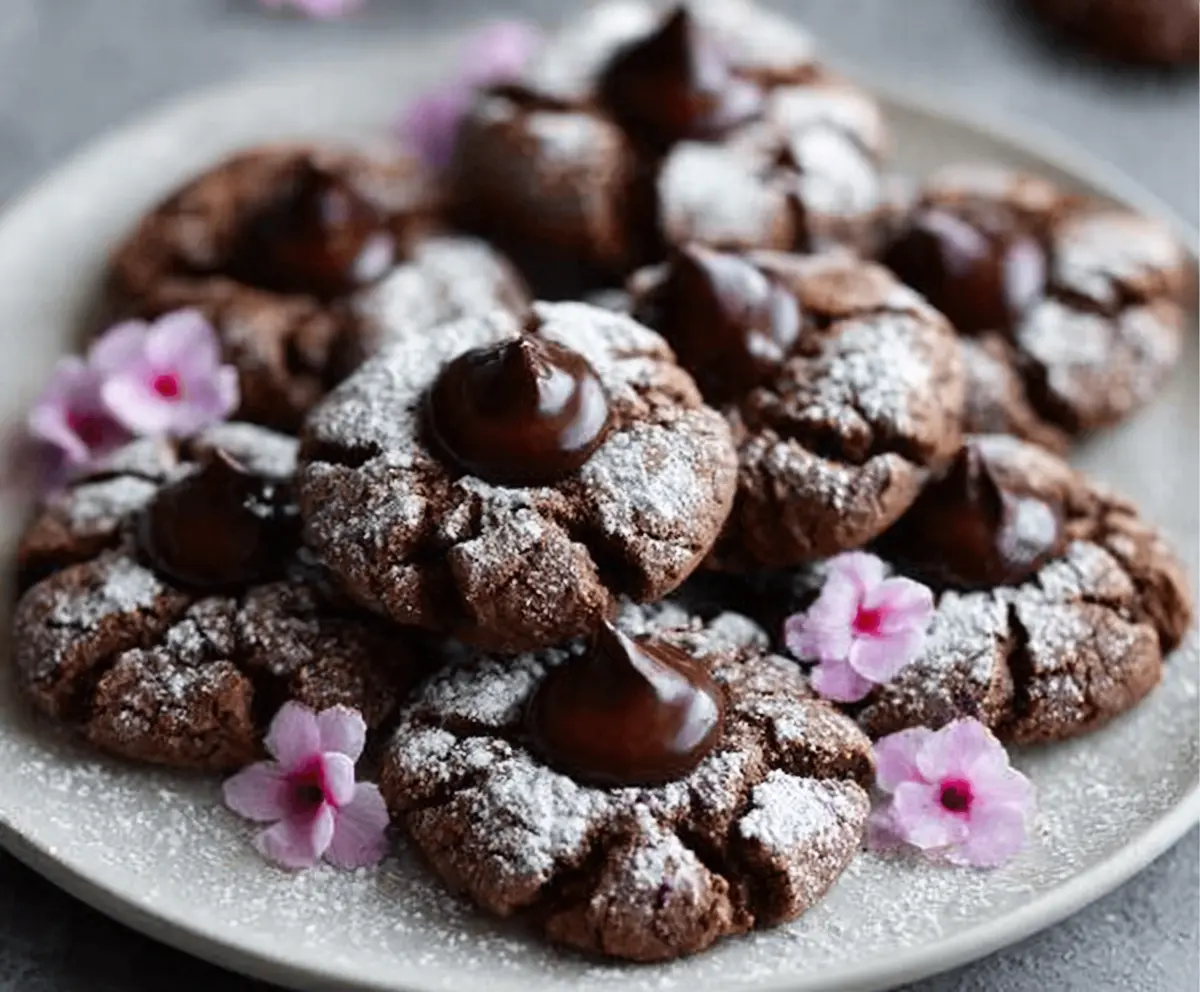
Chocolate Blossom Cookies are the perfect treat for anyone who loves a little chocolate and a touch of sweetness all rolled into one. These cookies are soft and chewy with a rich chocolate base, each topped with a shiny, melty chocolate kiss right in the center. The combination of the cookie’s texture and the chocolate center makes them an irresistible snack or dessert.
I love making these cookies when I want something that feels both special and simple. The chocolate kisses on top add a fun surprise that melts just enough while baking, making each bite a little moment of happiness. I find they bring out smiles every time I share them with friends or family.
My favorite way to enjoy Chocolate Blossom Cookies is fresh from the oven, with a cold glass of milk nearby. They also make great treats to bring to parties or to pack in lunchboxes because they’re easy to handle and don’t get messy. If you haven’t tried these cookies yet, I think you’re in for a real cozy, chocolatey delight!
Key Ingredients & Substitutions
All-Purpose Flour: This gives structure to the cookies. If you want gluten-free, try an all-purpose gluten-free blend that measures cup-for-cup like regular flour.
Unsweetened Cocoa Powder: It provides the chocolate flavor and rich dark color. Dutch-processed cocoa works well too and gives a smoother taste.
Butter: Softened butter helps the cookie stay tender and gives flavor. You can swap with margarine or coconut oil, but the texture will change slightly.
Sugars: Using both granulated and brown sugar balances sweetness and moisture. Brown sugar keeps cookies softer inside.
Chocolate Kisses or Chips: These are the signature center. If you can’t find chocolate kisses, use mini chocolate chips or chunks instead.
Powdered Sugar: Rolling dough balls in powdered sugar makes the pretty crackled look as the cookies bake.
How Do I Get the Cookie Center to Stay Soft with a Perfect Chocolate Meltdown?
Right after baking, you press the chocolate kiss or chip onto the hot cookie to melt it just right. Here’s how:
- Take cookies straight from the oven, while warm but not too hot to handle.
- Gently but firmly press the chocolate kiss or chip into the center of each cookie.
- Don’t press too hard or the cookies may flatten.
- Let the cookies cool on the pan for about 10 minutes so chocolate sets a bit but stays soft.
- If you want a more decorative chocolate top like in the photo, melt extra chocolate with some cream and pipe it on after cookies fully cool.
This method keeps the cookie chewy and soft with that melty chocolate blossom on top that makes these cookies special every time.
Equipment You’ll Need
- Baking sheet – I like lining it with parchment paper to prevent sticking and easy clean-up.
- Mixing bowls – one for dry ingredients and one for wet ingredients, to keep everything organized.
- Electric mixer or whisk – makes creaming the butter and sugars quick and smooth.
- Measuring cups and spoons – for accurate measurements, ensuring perfect cookies.
- Cookie scoop or spoon – helps form evenly sized cookie balls for uniform baking.
- Cooling rack – cools the cookies so they set just right without getting soggy.
- Small spoon or piping bag (optional) – for adding decorative melted chocolate on top if you like extra flair.
Flavor Variations & Add-Ins
- Stuff with caramel or peanut butter instead of chocolate kisses for a sweet surprise inside.
- Mix in chopped nuts or toffee bits for crunch and extra flavor.
- Swap dark cocoa for white cocoa powder and top with white or milk chocolate for a different look and taste.
- Add a pinch of cinnamon or espresso powder to the dough to deepen the chocolate flavor.
Chocolate Blossom Cookies
Ingredients You’ll Need:
Dry Ingredients:
- 1 cup (125 g) all-purpose flour
- 1/2 cup (40 g) unsweetened cocoa powder
- 1/2 teaspoon baking powder
- 1/4 teaspoon salt
Wet Ingredients:
- 1/2 cup (115 g) unsalted butter, softened
- 1/2 cup (100 g) granulated sugar
- 1/2 cup (110 g) packed brown sugar
- 1 large egg
- 1 teaspoon vanilla extract
For Rolling and Topping:
- 1 cup powdered sugar (for rolling cookies)
- 24 chocolate kisses or chocolate chips (for topping)
- Optional: 1/4 cup heavy cream or milk (for melting chocolate topping)
Time Needed
This recipe takes about 15 minutes to prepare, plus 1 hour for chilling the dough, and 8-10 minutes for baking. Allow another 10 minutes for cooling on the baking sheet before moving the cookies to a rack. Overall, plan about 1 hour and 30 minutes from start to finish.
Step-by-Step Instructions:
1. Prepare the Oven and Dry Ingredients
Preheat your oven to 350°F (175°C). Line a baking sheet with parchment paper to keep cookies from sticking. In a medium bowl, whisk together the flour, unsweetened cocoa powder, baking powder, and salt. Set this aside for later.
2. Cream Butter and Sugars
In a large bowl, use a mixer or whisk to beat the softened butter with the granulated sugar and brown sugar until the mixture is light and fluffy. This usually takes about 3-4 minutes and will make your cookies nice and tender.
3. Mix in Egg and Vanilla
Add the egg and vanilla extract to your butter and sugar mixture. Beat everything together until smooth and fully combined.
4. Combine Dry and Wet Ingredients
Slowly add the dry ingredients to the wet ingredients, mixing just until everything comes together. Be careful not to overmix, so your cookies stay soft and chewy.
5. Chill the Dough
Cover the dough with plastic wrap or a bowl and place it in the fridge for at least 1 hour. This step helps the dough firm up, making the cookies easier to shape and helping them keep their shape during baking.
6. Shape and Coat the Cookies
Once chilled, roll the dough into 1-inch balls. Then, roll each ball in powdered sugar until it’s fully coated. This coating gives the cookies their pretty crinkle effect after baking.
7. Bake the Cookies
Arrange the coated dough balls on your prepared baking sheet, leaving about 2 inches between each one. Bake in the preheated oven for 8-10 minutes. You’ll know they’re ready when the tops look cracked and the cookies are set but still soft inside.
8. Add the Chocolate Center
Remove the cookies from the oven, and while they’re still warm, gently press one chocolate kiss or chocolate chip into the center of each cookie. Don’t press down too hard to keep the cookie tall and soft.
9. Cool and Finish
Let the cookies cool on the baking sheet for about 10 minutes so the chocolate can soften without melting completely. Then, transfer them to a wire rack to cool fully. If you want to add a decorative touch like piping melted chocolate as shown in the picture, melt some chocolate with a bit of heavy cream or milk, then use a piping bag or a small spoon to decorate the cooled cookies.
Enjoy your delicious, soft Chocolate Blossom Cookies with a lovely melty chocolate center and a beautiful crackled look! Perfect fresh from the oven with a milk glass or packed for sharing.
Can I Use Frozen Dough for Chocolate Blossom Cookies?
Yes! You can freeze the dough balls after rolling them in powdered sugar. Simply place them on a baking sheet to freeze individually, then transfer to an airtight container. Bake straight from frozen—just add a couple extra minutes to the baking time.
What Can I Substitute for Chocolate Kisses?
If you don’t have chocolate kisses, mini chocolate chips, chunks, or even wrapped caramels can work. Just press them into the cookie center right after baking to get that melty surprise.
How Should I Store Leftover Cookies?
Store your cookies in an airtight container at room temperature for up to 3 days. To keep chocolate centers nice and soft, add a slice of bread inside the container—this helps keep moisture in.
Can I Make These Cookies Ahead of Time?
Absolutely! Prepare and shape the dough balls, then refrigerate or freeze them. When ready, bake as directed. This makes for an easy make-ahead treat whenever you want fresh, warm cookies.