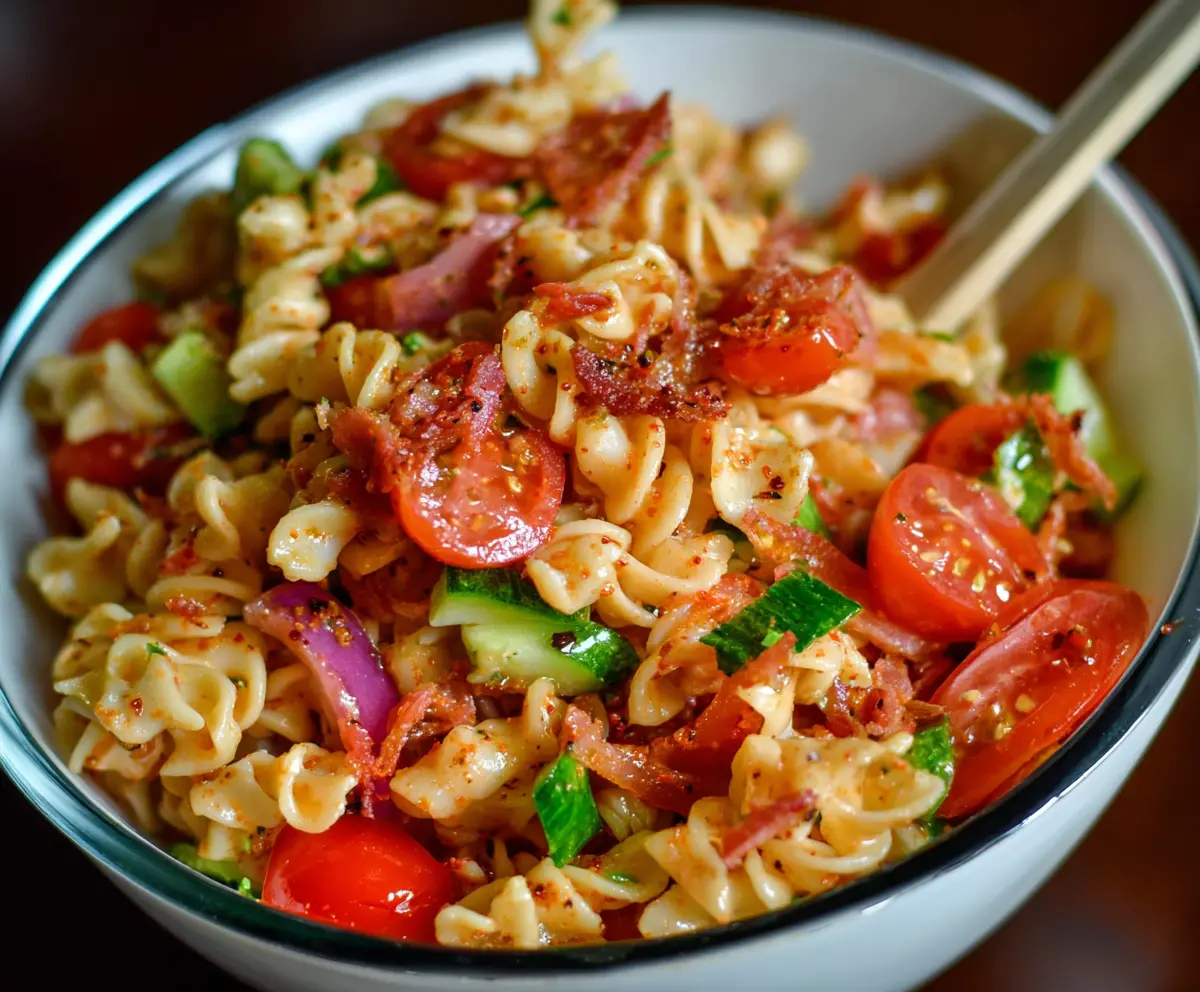
Bloody Mary Pasta Salad is a fun and flavorful twist on a classic pasta salad, packed with zesty tomato juice, crunchy celery, and a pop of spicy horseradish. It’s a lively mix that brings the bright, tangy flavors of a Bloody Mary cocktail into a pasta dish, making it a perfect addition to any summer BBQ or picnic.
I love making this salad when I want something a little different and refreshing. The combination of savory tomato flavor with a bit of kick from hot sauce always surprises people in the best way. I like to add extra celery for that crisp crunch, and sometimes a splash of pickle juice if I’m feeling adventurous.
My favorite way to serve this pasta salad is chilled and alongside some grilled chicken or fresh bread. It’s easy to make ahead, so I often prepare it the night before, letting the flavors really come together. Plus, it’s a crowd-pleaser that gets everyone asking for the recipe at the next get-together!
Key Ingredients & Substitutions
Rotini pasta: This twisty pasta holds the dressing well. If you don’t have rotini, try elbow macaroni, fusilli, or penne. Just cook until al dente so the salad isn’t mushy.
Tomato juice & vodka: Tomato juice is the base of the dressing, giving it that Bloody Mary flavor. Vodka adds a slight kick but can be left out or replaced with more tomato juice for a kid-friendly version.
Horseradish & hot sauce: These add heat and tang. Start with less and add more to taste, especially if you want to control the spiciness.
Bacon: Crispy bacon brings a smoky crunch. For a vegetarian option, swap with smoked paprika or smoked almonds for texture.
How Do You Make the Dressing Flavorful and Balanced?
The dressing is what makes this pasta salad unique. To get it just right:
- Whisk together tomato juice, vodka (or extra tomato juice), Worcestershire sauce, horseradish, hot sauce, lemon juice, olive oil, celery salt, and smoked paprika.
- Season with salt and pepper. Taste as you go, adding more horseradish or hot sauce if you want more bite.
- Mix the dressing with cooled pasta so the flavors soak in evenly.
- Let it chill for at least an hour to blend the tastes well before adding veggies and bacon.
Taking time to chill the salad helps the dressing flavors come through without overpowering the fresh veggies.
Equipment You’ll Need
- Large pot – I use this to cook the pasta easily and get it just right.
- Colander – makes draining the pasta quick and mess-free.
- Large mixing bowl – perfect for tossing all ingredients together.
- Whisk – helps mix the dressing smoothly without lumps.
- Measuring cups and spoons – for precise amounts of juice, sauce, and seasonings.
Flavor Variations & Add-Ins
- Use cooked shrimp or cooked chicken instead of bacon for a protein boost.
- Add chopped pickles or olives for extra tang and a salty bite.
- Try smoked paprika or chipotle powder for a smoky or spicy twist.
- Mix in diced avocado or mozzarella for creaminess and richness.
How to Make Bloody Mary Pasta Salad
Ingredients You’ll Need:
For the Pasta Salad:
- 8 oz rotini pasta (or any pasta of choice)
- 1 cup cherry tomatoes, halved
- 1/2 cup cucumber, diced
- 1/4 cup red onion, thinly sliced
- 4 strips bacon, cooked and crumbled
- 1/2 cup celery, diced (optional)
For the Bloody Mary Dressing:
- 1/2 cup tomato juice
- 1/4 cup vodka (optional, or substitute with extra tomato juice)
- 1 tbsp Worcestershire sauce
- 1 tbsp horseradish (adjust to taste)
- 1 tsp hot sauce (like Tabasco, adjust to taste)
- 1 tbsp lemon juice
- 1/4 cup olive oil
- 1/2 tsp celery salt
- 1/2 tsp smoked paprika
- Salt and pepper to taste
- Fresh parsley or celery leaves for garnish
How Much Time Will You Need?
This recipe takes about 15 minutes to prepare, plus another hour to chill in the refrigerator. Chilling helps the flavors blend together nicely, making the salad even tastier when served cold.
Step-by-Step Instructions:
1. Cook and Cool the Pasta:
Bring a large pot of water to a boil. Add the rotini pasta and cook according to the package instructions until al dente (tender but still firm). Drain the pasta in a colander, then rinse under cold water to cool it quickly. Set the pasta aside.
2. Make the Bloody Mary Dressing:
In a large mixing bowl, whisk together the tomato juice, vodka (if using), Worcestershire sauce, horseradish, hot sauce, lemon juice, olive oil, celery salt, smoked paprika, salt, and pepper. Whisk well until all ingredients are combined and smooth.
3. Combine Pasta and Dressing:
Add the cooled pasta to the bowl with the dressing. Toss gently to coat the pasta evenly with the dressing.
4. Add the Fresh Veggies and Bacon:
Gently fold in the cherry tomatoes, diced cucumber, thinly sliced red onion, diced celery (if using), and crumbled bacon. Mix carefully so the ingredients are well distributed without crushing the veggies.
5. Adjust Seasoning and Chill:
Taste the salad and add more salt, pepper, or hot sauce if you like it spicier. Cover the bowl and place it in the refrigerator for at least one hour. This chilling time allows all the flavors to blend beautifully.
6. Garnish and Serve:
Before serving, sprinkle fresh parsley or celery leaves on top for a burst of color and freshness. Serve the pasta salad chilled and enjoy!
Can I Use Different Pasta for This Salad?
Absolutely! Rotini works great because it holds the dressing well, but you can use penne, fusilli, or elbow macaroni. Just be sure to cook it al dente so the salad doesn’t get mushy.
Can I Skip the Vodka in the Dressing?
Yes, the vodka is optional. You can simply replace it with extra tomato juice to keep the flavor without the alcohol, making it perfect for all ages.
How Long Can I Store Leftover Pasta Salad?
Store leftovers in an airtight container in the fridge for up to 3 days. Give it a good stir before serving again, and add a splash of tomato juice or olive oil if it feels dry.
Can I Make This Salad Ahead of Time?
Definitely! In fact, chilling it for at least an hour helps the flavors meld deliciously. You can prep it up to a day ahead for the best taste and convenience.